You’re probably here because there is so little information out there about how to authenticate with Twitter through a Chrome Extension (I’ve been through that). That’s why I´m here today to give you a complete introduction to achieving such authentication.
First of all, we must remember that only Manifest v3 extensions can be uploaded to the Chrome Store. If you are not very familiar with Manifest files, take a look at this article.
Manifest v3 introduced a lot of security, privacy, and performance measures. This is a huge obstacle since it blocks almost any communication with external scripts, and we can’t open popups from the extension front-end.
Knowing more about these major changes in the manifest file, let’s get to our extension.
First of all, we are going to create our app using CRA and the typescript template:
npx create-react-app twitter-auth-extension --template typescriptOnce built, we will have our new app. First of all, we have to change the manifest file, located under public/manifest. For now, we will leave it like this:
{ “name”: “Create React App Sample”, “description”: “Sample Twitter Extension”, “version”: “1.0”, “manifest_version”: 3, “action”: { “default_popup”: “index.html”, “default_title”: “Open the Extension” }, “icons”: { “192”: “logo192.png” }}As for our package.json, we will also have to install and modify some dependencies. For this example, just replace the “dependencies” property with the following:
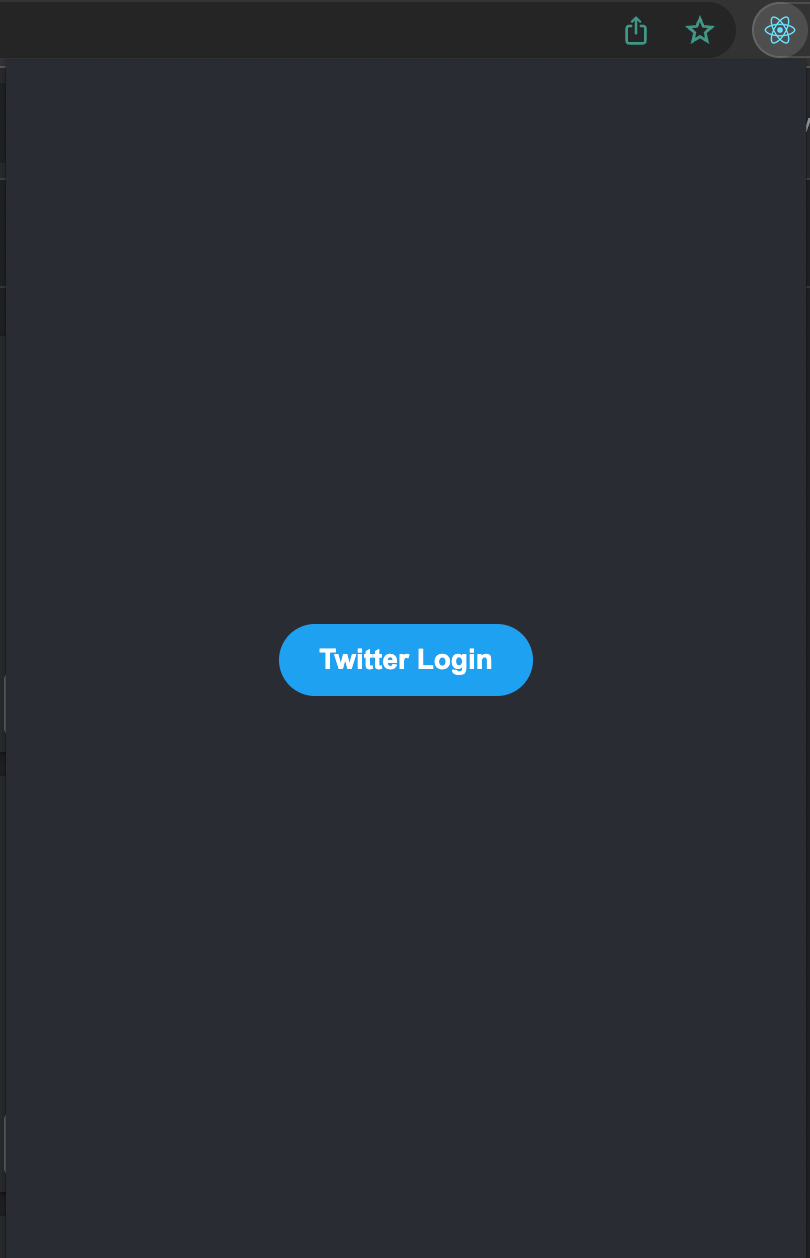
"dependencies": { "@types/chrome": "^0.0.197", "@types/jest": "^24.9.1", "@types/node": "^12.20.55", "@types/react": "^16.14.32", "@types/react-dom": "^16.9.16", "react": "^18.2.0", "react-app-rewired": "^2.2.1", "react-dom": "^18.2.0", "react-scripts": "5.0.1", "typescript": "^3.9.10"},We will use a simple UI with a “Login with Twitter” button for this example.
If we now build our app, we will be able to open it as a chrome extension. Let’s do so by running the following command in the terminal:
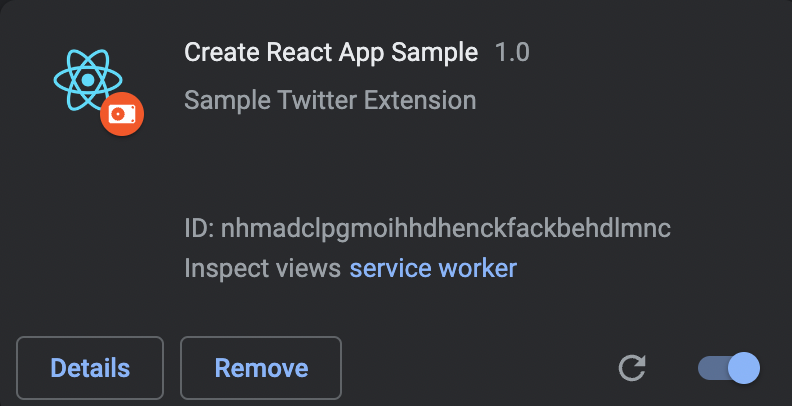
npm run buildOnce this process is completed, we have to go to chrome://extensions/ and make sure you check the “Developer Mode” slider placed in the upper right corner. Then press the “Load Unpacked” button and select our app’s build folder. Once uploaded, we will have something like this:

And if we open it, we will have our extension:
Now we will have to create our background service worker. You can read about Background Service Workers in this article, but just for you to know, they run logic in the background of our browser at all times.
In order to be able to create our background worker using node, we will have to create some overrides to the webpack that CRA has by default. To do so, we are going to create a file at the root of our project, called:
config-overrides.js
With the following configurations:
const paths = require('react-scripts/config/paths');const HtmlWebpackPlugin = require('html-webpack-plugin');const ManifestPlugin = require('webpack-manifest-plugin');const MiniCssExtractPlugin = require('mini-css-extract-plugin');const webpack = require("webpack");module.exports = {     webpack: override,};// Function to override the CRA webpack configfunction override(config, env) {    const fallback = config.resolve.fallback || {};    config.resolve.fallback = fallback;    config.plugins = (config.plugins || []).concat([        new webpack.ProvidePlugin({            process: 'process/browser',            Buffer: ['buffer', 'Buffer']        })    ]);
    // Remove the default HtmlWebpackPlugin    config.entry = {        index: paths.appIndexJs,        background: paths.appSrc + '/background',    };    // Change output filename template to get rid of hash there    config.output.filename = 'static/js/[name].js';    // Disable built-in SplitChunksPlugin    config.optimization.splitChunks = {        cacheGroups: {default: false}    };    // Disable runtime chunk addition for each entry point    config.optimization.runtimeChunk = false;     // Shared minify options    const minifyOpts = {        removeComments: true,        collapseWhitespace: true,        removeRedundantAttributes: true,        useShortDoctype: true,        removeEmptyAttributes: true,        removeStyleLinkTypeAttributes: true,        keepClosingSlash: true,        minifyJS: false,        minifyCSS: false,        minifyURLs: false,    };    const isEnvProduction = env === 'production';    // Custom HtmlWebpackPlugin instance for index page    const indexHtmlPlugin = new HtmlWebpackPlugin({        inject: true,        chunks: ['index'],        template: paths.appHtml,        filename: 'index.html',        minify: isEnvProduction && minifyOpts,    });
    // Replace original HtmlWebpackPlugin instance in config.plugins with the above one    config.plugins = replacePlugin(config.plugins,        (name) => /HtmlWebpackPlugin/i.test(name), indexHtmlPlugin    );    // Custom ManifestPlugin instance to cast asset-manifest.json back to old plain format    const manifestPlugin = new (ManifestPlugin.WebpackManifestPlugin      || ManifestPlugin)({
            fileName: 'asset-manifest.json',    });    // Replace original ManifestPlugin instance in config.plugins with the above one    config.plugins = replacePlugin(config.plugins,        (name) => /ManifestPlugin/i.test(name), manifestPlugin    );    // Custom MiniCssExtractPlugin instance to get rid of hash in filename template    const miniCssExtractPlugin = new MiniCssExtractPlugin({        filename: 'static/css/[name].css'    });    // Replace original MiniCssExtractPlugin instance in config.plugins with the above one    config.plugins = replacePlugin(config.plugins,        (name) => /MiniCssExtractPlugin/i.test(name), miniCssExtractPlugin    );    // Remove GenerateSW plugin from config.plugins to disable service worker generation    config.plugins = replacePlugin(config.plugins,        (name) => /GenerateSW/i.test(name)    );    return config;}// Utility function to replace/remove specific plugin in a webpack configfunction replacePlugin(plugins, nameMatcher, newPlugin) {    const i = plugins.findIndex((plugin) => {        return plugin.constructor && plugin.constructor.name &&            nameMatcher(plugin.constructor.name);    });    return i > -1?        plugins.slice(0, i).concat(newPlugin ||[]).concat(plugins.slice(i+1)) :        plugins;}
Now we can keep on creating our background worker. We will create a new file “background.ts” under the src folder.
Just to test, we are going to add this following code to it:
console.log("Hello From Background");export {};Now we have to add this background worker to our manifest file. To do so, just add this property:
"background": { "service_worker": "static/js/background.js"},This tells our extension which script to execute as a background worker.
Now we have to build our app again using the webpack overrides we specified before. To do so, we have to change the “scripts” property from package.json :
“scripts”: { “start”: “react-app-rewired start”, “test”: “react-app-rewired test”, “eject”: “react-scripts eject”, “build”: “INLINE_RUNTIME_CHUNK=false react-app-rewired build”},You may wonder the command has “INLINE_RUNTIME_CHUNK=false”. This is because Manifest v3 doesn’t allow Inline JS Code, and in this way we make our extension CSP compatible.
Now we can run “npm run build” and wait for the process to finish. Once built, just refresh the extension and a new “service worker” button should appear on the extension card:
If we press the button, we will be shown with the console, where a “Hello From Background” log should be visible. Congrats! You have created a background worker for your extension.
We now need to think how our authentication system will work. We will use the 3-legged OAuth flow from twitter where we will:
- Get an OAuth Request Token.
- Get an OAuth Access Token.
- Verify Credentials.
To achieve this system, we will need to create a Twitter App which users will authorize, a backend server to communicate with our Twitter app, and our extension.
First of all, we will have to create a Twitter app. You can do so by going to the Twitter Developer Portal, registering, and then creating an app. This will give us an API Key, API Key Secret, and Bearer Token. Keep them saved, as they will be important shortly.
We now need to go to our app’s settings, and go to “User Authentication Settings”, and use the following settings:
- App Permissions: Read
- Type of App: Native App
Lastly for “App Info” we have to fill the “Callback URI” and the “website URL” inputs. For Website URL you can put what ever URL you want. But for Callback URI you need to fill it with your extension’s id. This callback will be used for the authorization to know where to send the resulting data.
For this just replace the “<extensionId>” with your extension’s id, which can be found under “chrome://extensions”:
https://<extensionId>.chromiumapp.org
Now we need a back-end server where we can interact with the Twitter API (since it throws CORS error if we try querying from our extension). In this case, we will create a really simple script in node and express, since this is not the scope of this blog.
This is the script we used:
const express = require('express');const OAuth = require('oauth');const bp = require('body-parser');const fetch = require('node-fetch');var cors = require('cors'); const app = express();const PORT = 3000;app.use(cors());app.use(bp.json())app.use(bp.urlencoded({ extended: true }))app.listen(PORT);app.get('/request_access_token', async function(req, res){ console.log("Requesting access token"); var oauth = await new OAuth.OAuth( 'https://api.twitter.com/oauth/request_token', 'https://api.twitter.com/oauth/access_token', 'APIKey', 'APIKeySecret', '1.0A', null, 'HMAC-SHA1' ) await oauth.getOAuthRequestToken(function(error, token, secret, results) { console.log('Request Token: ' + token); console.log('Request Secret: ' + secret); res.send({token: token, secret: secret}); }); oauth.getOAuthAccessToken});app.post('/access_token', async function(req, res){ console.log("Validating access token"); var oauth = await new OAuth.OAuth( 'https://api.twitter.com/oauth/request_token', 'https://api.twitter.com/oauth/access_token', 'APIKey', 'APIKeySecret', '1.0A', null, 'HMAC-SHA1' ); await oauth.getOAuthAccessToken(req.body.token, req.body.secret, req.body.verifier, function(error, token, secret, results) { res.send({token: token, secret: secret}); });});app.post('/get_user_profile', async function(req, res){ console.log("Getting User Profile"); var oauth = await new OAuth.OAuth( 'https://api.twitter.com/oauth/request_token', 'https://api.twitter.com/oauth/access_token', 'APIKey', 'ApiKeySecret', '1.0A', null, 'HMAC-SHA1' ); await oauth.get( 'https://api.twitter.com/1.1/account/verify_credentials.json', req.body.token, req.body.secret, function (e, data, resp){ if (e) console.error(e); res.send(data); } );});Where you have to replace “APIKey” with your app’s Api Key, and “APIKeySecret” with your app’s Api Key Secret.
We can now run the server using the following command:
node index.jsAnd the server will be running on the specified port (3000 in our case).
We are now ready to integrate the twitter Api to our extension. We are going to start by making the “Twitter Login” button on our extension trigger a function in the Background Service.
In order to achieve that, we are going to use the chrome runtime API to listen to events. You can read more about this API here.
In this case, we are going to make use of “chrome.runtime.sendMessage” to send a message from the front app to the background worker.
We can have a function like this:
const login = async () => { chrome.runtime.sendMessage({type: ‘login’});}And then just add a listener to the button to trigger this function:
<button onClick={() => login()}>Twitter Login</button>Now we have to listen to these messages from the background service using the “chrome.runtime.onMessage” event. We just need to check the “type” property to be as expected, and then trigger a function. Just to test this, we will log a message to the console. So in our “background.ts” we are going to add the following:
chrome.runtime.onMessage.addListener(async (request: any) => { if (request.type === 'login') { console.log("Login Requested"); return true; }});If we now build our app, and refresh the extension, every time we hit the button from the app, a message should be shown in the console:

Now we need to enable our background script to use the “chrome.identity” API, which is blocked by default in manifest v3. To do so, we just need to go to our manifest file, and add the following property:
"permissions": [ "identity"]Now we can create our login function for the background script:
const login = async () => { const response = await (await fetch(`http://localhost:3000/request_access_token`)).json(); const authUrl = new URL('https://api.twitter.com/oauth/authenticate'); authUrl.searchParams.set('oauth_token', response.token); authUrl.searchParams.set('force_login', 'false'); chrome.identity.launchWebAuthFlow({ url: authUrl.href, interactive: true }, async (responseUrl: any) => { const oauth_token = responseUrl.split('?')[1].split('&')[0].split('=')[1]; const oauth_verifier = responseUrl.split('?')[1].split('&')[1].split('=')[1]; const data = { token: oauth_token, verifier: oauth_verifier, secret: response.secret }; const access_token = await fetch(`http://localhost:3000/access_token`, { method: 'POST', body: JSON.stringify(data), headers: { 'Content-Type': 'application/json','Accept':'application/json'} }); console.log(await access_token.json()); });}Before testing this out, let me explain this script. First we fetch our back-end server to get the “OAuth Request Token”. We use this request token to create a login popup asking the user to authorize our Twitter App. Once authorized, we get the “OAuth Token” and “OAuth Verifier” from the callback URL of Twitter, which we use to get our “Twitter Access Token”.
If we now build our app, and then reload the extension, we can now press the Login button, and we will be prompted with the twitter authorization. Something like this:

If we authorize the app, we will get the token the secret from our Twitter account, which we can use to consume the Twitter API.
This post was originally published on Medium by Manuel Ferreras
Find out what’s possible for your business by scheduling a free 30-minute consultation with Omar. Are you curious to see what technology can do for your business? Or, do you already have a vision and need someone to come alongside you to make it a reality?
Our co-founder, Omar Saadoun, is a leading expert in emerging digital technology whose passion is to help business owners like you realize the limitless possibilities of tech.
 Co-Founder & CEO @ Inmind - Blockchain & Mobile Expert | DAO / Tokenization / Web3 | CTO @ Brainstems (Former TIEX) | Board Member @ CUTI